
If you’re using Mousepad on GhostBSD XFCE, you’ve probably noticed the default themes feel a bit outdated. In this tutorial, I’ll walk you through the process of creating and applying a custom Mousepad theme, complete with all the steps and the theme code itself.
Note: This tutorial uses nano for editing. If you don’t have nano installed, you can use Geany or any other text editor you’re comfortable with.
Step 1: Check GtkSourceView Version
Run the following command to see which versions are installed:
pkg info | grep gtksourceviewThe output shows that both, gtksourceview4 and gtksourceview5 are installed.
Step 2: Create the Theme Directory
Mousepad uses GtkSourceView 4, so let’s create the following directory:
mkdir -p ~/.local/share/gtksourceview-4/styles/Step 3: Create the Theme File
Next, we’ll create a file called mickey.xml inside the styles directory.
nano ~/.local/share/gtksourceview-4/styles/mickey.xmlStep 4: Mickey Theme Code
This is the Mickey theme, designed with my favorite colors.
Copy and paste the code below into the file, then save it:
<style-scheme id="mickey" _name="Mickey Theme" version="1.0">
  <author>55i.ca</author>
  <_description>Minimalist dark theme with hacker-style highlights</_description>

  <!-- Base text and background -->
  <style name="text" foreground="#abb2ba" background="#121212"/>

  <!-- Line numbers -->
  <style name="line-numbers" foreground="#abb2ba" background="#121212"/>

  <!-- Current line highlight -->
  <style name="current-line" background="#1a1a1a"/>

  <!-- Selection highlight -->
  <style name="selection" foreground="#00FF00" background="#000000"/>

  <!-- Cursor -->
  <style name="cursor" foreground="#abb2ba"/>
</style-scheme>
Step 5: Activate the Theme
Close and open Mousepad, then go to:
Preferences → View → Color Scheme.
Select “Mickey Theme” from the list.
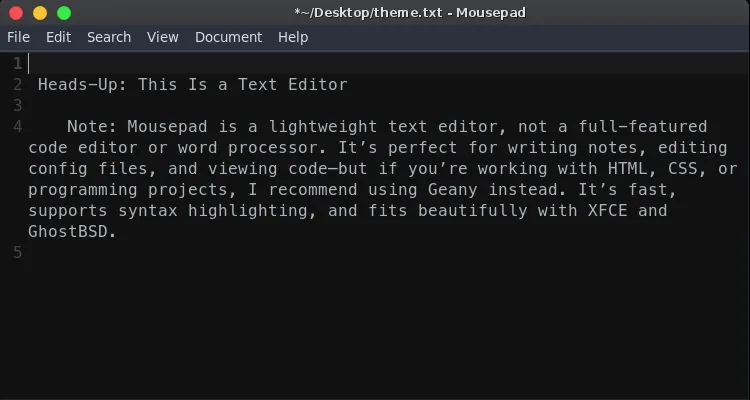
If all went well, you will see the new Mickey Theme.
Done!
You now have a sleek, customized Mousepad theme tailored to your style. Feel free to tweak colors or add more styles as needed!